
Google Analytics is a free service by Google that provides you valuable data of your website or blog. It can provides you more detailed report such as your blog’s overall traffic sources, conversation rate, page views, types of visitors, geo location, bounce rate, staying time on your blog, keywords and some more amazing features. It also generates PPC advertising reports, email marketing campaign details.
SEE ALSO: How To Submit Blogger Sitemap To Google Webmaster Tools
So it is extremely important to install Google Analytics in your blog to track your whole blog statistics and traffic information.
This tutorial tells you how to add Google Analytics in your Blogger blog to track your sensitive traffic data.
READ THIS TOO: How To Start Tracking Between ClickBank And Google Analytics?

1. Go to Google Analytics website.
2. Sign in with your Google account.
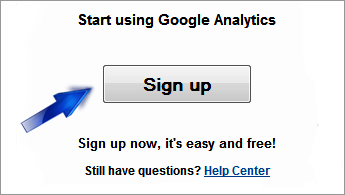
3. After sign in click Sign Up button.
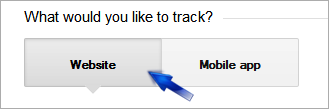
4. Select Website.
5. Give a name for your account.

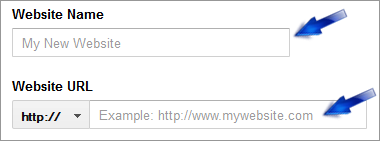
6. Type your Blog name and your Blog URL.
7. Select proper category.

8. Set your country and exact time zone.

9. Fill the rest information as your choice.
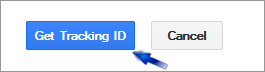
10. Click Get Tracking ID.
11. Accept their terms and conditions.
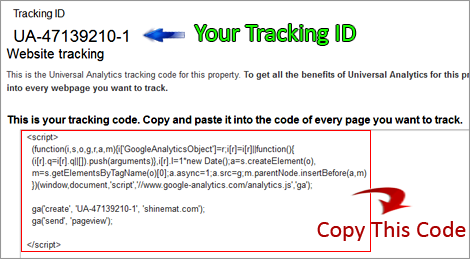
12. You will get an unique Tracking ID and a piece of code. Just copy that code.
1. Sign in to your blogger blog.
2. Click on your blog name and select Template from left side.
Backup your template before making any changes.

3. Click on your template code box and press Ctrl+F to search.

4. Now search for </body> tag.
5. Paste your tracking code just before/ above the </body> tag.
6. Click Save Template to done.
7. Go to your Google Analytics page and refresh this. You will see "Tracking Installed" notification. Now you are all done.
Adding Tracking ID Into Blogger
To add your GA Tracking ID in your blogger blog follow the simple steps.
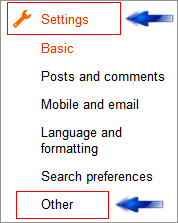
1. Go to your blogger blog and click Settings tab from left side menu.
2. Click Other tab.
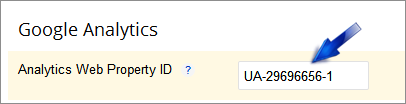
3. Scroll to bottom and paste your only Tracking ID in Analytics Web Property ID field.
4. Finally click Save Settings
Now you have completely finished your Google Analytics setup process for blogger blog.
Wait at least 24 hours to see your traffic report results.
If you get any error please let us know. We will be glad to help you. Stay well pals.
SEE ALSO: How To Submit Blogger Sitemap To Google Webmaster Tools
So it is extremely important to install Google Analytics in your blog to track your whole blog statistics and traffic information.
This tutorial tells you how to add Google Analytics in your Blogger blog to track your sensitive traffic data.
READ THIS TOO: How To Start Tracking Between ClickBank And Google Analytics?
Part One
1. Go to Google Analytics website.
2. Sign in with your Google account.
3. After sign in click Sign Up button.
4. Select Website.
5. Give a name for your account.
6. Type your Blog name and your Blog URL.
7. Select proper category.
8. Set your country and exact time zone.
9. Fill the rest information as your choice.
10. Click Get Tracking ID.
11. Accept their terms and conditions.
12. You will get an unique Tracking ID and a piece of code. Just copy that code.
Part Two
1. Sign in to your blogger blog.
2. Click on your blog name and select Template from left side.
Backup your template before making any changes.
3. Click on your template code box and press Ctrl+F to search.
4. Now search for </body> tag.
5. Paste your tracking code just before/ above the </body> tag.
6. Click Save Template to done.
7. Go to your Google Analytics page and refresh this. You will see "Tracking Installed" notification. Now you are all done.
Adding Tracking ID Into Blogger
To add your GA Tracking ID in your blogger blog follow the simple steps.
1. Go to your blogger blog and click Settings tab from left side menu.
2. Click Other tab.
3. Scroll to bottom and paste your only Tracking ID in Analytics Web Property ID field.
4. Finally click Save Settings
Now you have completely finished your Google Analytics setup process for blogger blog.
Wait at least 24 hours to see your traffic report results.
If you get any error please let us know. We will be glad to help you. Stay well pals.
Thanks For Your valuable posting, it was very informative. Am working in Erp In India
ReplyDeletePost a Comment
Please DON'T spam here. Spam comments will be deleted just after our review.