
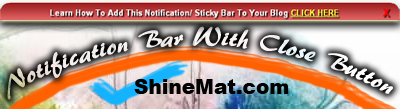
Have you seen a notification bar in some blogs? I hope you saw. If don’t please see the demo below. It’s a good and a creative way to promote your new announcement, feature post and many important updates you may have. This bar will be sticked right to your footer section of your blog.
In this tutorial I will share with you how to add a sticky or notification bar with mouse hover effect and close button.

So, Let’s move forward…
How To Add Mouse Hover Effect Notification/ Sticky Bar To Blogger
1. Log in to your Blogger Blog
2. Go to Design Click Edit HTML (Don't forget to backup your template)
3. Find the following code </body> by pressing Ctrl+F
4. Now simply paste the following code before/ above it.
Now change color and message as you want
Simply change the highlighted red text as like you want. Color codes like #xxxxxx, change it as like your mind say. Best of luck.
In this tutorial I will share with you how to add a sticky or notification bar with mouse hover effect and close button.
So, Let’s move forward…
How To Add Mouse Hover Effect Notification/ Sticky Bar To Blogger
1. Log in to your Blogger Blog
2. Go to Design Click Edit HTML (Don't forget to backup your template)
3. Find the following code </body> by pressing Ctrl+F
4. Now simply paste the following code before/ above it.
<!-- Notification bar code start - http://www.shinemat.com/ -->
<style type='text/css'>
#sm-sticky
{background: #FF2020 url('https://blogger.googleusercontent.com/img/b/R29vZ2xl/AVvXsEi-psJRLjAi2mVuwL-gdk7S8U0POf2t2kNaGtDKPYnGJ_UsKvfodubpJlaB043PivqfJQY2jtANtpnisvG-4skfED5Aq3yRMIz0lFwKC3rVKQd1Wi8DYSfj1p5mpRHPqmpEqeU1NdLuWJk/s400/stickybar.png') repeat;
color:#fff;
text-shadow: 2px 2px 1px #090909; /*Right, Down, Blur, Shadow color*/
text-align: center;
margin:0 auto;
border-top: 1px solid #fff;
height:28px;
font-size:13px;
position:fixed;
bottom:0;
z-index:999;
width:100%;
border-top-left-radius:15px;
border-top-right-radius:15px;
display:block;
font-weight: bold;
font-family: arial,"Helvetica";
font-color:#fff;
}
#sm-sticky:hover
{background: #FB8229 url('https://blogger.googleusercontent.com/img/b/R29vZ2xl/AVvXsEi-psJRLjAi2mVuwL-gdk7S8U0POf2t2kNaGtDKPYnGJ_UsKvfodubpJlaB043PivqfJQY2jtANtpnisvG-4skfED5Aq3yRMIz0lFwKC3rVKQd1Wi8DYSfj1p5mpRHPqmpEqeU1NdLuWJk/s400/stickybar.png') repeat;}
#sm-sticky p{line-height:5px; font-size:13px; text-align:center; width:95%; float:left;}
#sm-sticky p a{ text-decoration:underline; color:#FAFA2D;}
.sm-cross{display:block; position:relative; right:15px; float:right;}
.sm-cross a{font-size:18px; font-weight:bold; font-family:"Arial"; color:#FF0000; line-height:30px;
}
</style>
<div id='sm-sticky'>
<p>Learn How To Add This Notification/ Sticky Bar To Your Blog <a href='http://www.shinemat.com/2012/03/how-to-add-sticky-or-notification-bar.html' target='_blank' title='Sticky Bar Made By ShineMat.com'>CLICK HERE</a></p>
<div class='sm-cross'><a href='javascript:hide_cross();'>X</a></div>
</div>
<script language='JavaScript'>
function hide_cross() {
crosstbox = document.getElementById("sm-sticky");
crosstbox.style.visibility = 'hidden';
}
</script>
<!-- Notification bar code end - http://www.shinemat.com/ -->
5. Now click Save Template and you are finished.Now change color and message as you want
Simply change the highlighted red text as like you want. Color codes like #xxxxxx, change it as like your mind say. Best of luck.
Nice one. I like it. i just apply it in my blog. Thank you for sharing.
ReplyDeleteIT outsourcing companies
I want to show the bar at the top but its not working. Its only showing at bottom.
ReplyDelete@Basnet Blog: This tricks only for bottom notification bar.
ReplyDeleteOkay, notification seems new knowledge for me, nice to read this. Thanks Bro for the article. I ll add the notification to my blog now
ReplyDeleteFantastic work, thank you so much for shedding a light on the topic.
ReplyDeleteYes, thanks for this useful information!
ReplyDeleteHi, webmaster just wanted to say thanks. I enjoy reading your blog and i have followed closely your tutorial. Thanks so much for sharing, I really love your effort in educating bloggers with unique and quality posts.
ReplyDeleteRegards,
ProblogTuts.Com
@Problogger I am really glad to see your interest on my blog. Thank you so much.
ReplyDeletenice post thank you
ReplyDeletePost a Comment
Please DON'T spam here. Spam comments will be deleted just after our review.